Tuesday, April 29, 2014

“Art is when you hear a knocking from your soul — and you answer.” ~Terri Guillemets

Today I just had to stop for a moment from my work at hand and write. It's a day where I ponder other career tracks because the rainy weather, my Civil Wars playlist on Pandora, and my lack of creative time lately are conspiring against me. I'm having daydreams of sitting at my computer and writing or maybe editing photos or creating a collage of some sort. Something else than what I am doing right now. I need more creativity in my life is what my soul is telling me!

Instead, I shall settle on sharing with you the wonder that is my daughter. I can't believe how much she has grown in just a year. Her 2nd birthday approaches soon and I just can't believe it.

Look at this tiny tot. She just steals my heart.
I hope you have some creativity in your day on this dreary Tuesday. Perhaps later I will share the great progress we've made on the tiny tot's play area in our yard. It's come a long way!

Monday, February 10, 2014

"Blankets wrap you in warmth, quilts wrap you in love." ~ Anon.

I, creator of the let's-think-of-the-most-complicated-new-project-that-I-know-nothing-about-but-I'm-going-to-start-and-finish-in-less-than-a-month plans, have finally created a project that was actually simplistic, something I know a teensy bit about, and finished it in about a month! My dear friends are expecting their first baby in March and I really wanted to make them a quilt. However, unlike my first quilt that took me over a year to complete and give to friends, I wanted to design one that was simple but cute and give it to them BEFORE they have their baby. Mission accomplished!

Originally, I wanted to make two baby quilts: one representing the father's home state/university (Ohio State U) and one representing the mom's Irish heritage. I decided this about two weeks before the shower (that was an old Miranda plan). But when I went to look for fabric, surprise surprise but in Pittsburgh it was hard to find OSU material. But while browsing the fabrics in Joann's, I stumbled upon the sailor bear print, which is just adorable.

Image from Joann.com
I belatedly remembered that their nursery would have a nautical theme and thought, "New plan!" How about I only make one quilt? And instead of a MILLION tiny squares, I choose a design with bigger blocks. I roamed the store to pick fabrics that went with the theme and I found the octopus one next. I wanted to pop out the bits of red on the sailor bear print and I finally found the red fabric that looks like tiny bubbles. I was happy with just these three prints and I pored over a number of my quilting pattern books to find a design that was small enough for a baby quilt but balanced equally with only three prints. And ta da! Here is the final product.


I will also admit that with my first quilt, I didn't necessarily follow ALL the instructions for how to make one, start to finish. And frankly, I think those details matter. If you look at the pics of my first one, you can tell it's a little puckered (on the back mostly) and luckily, the larger design and tiny square variations hide much of the other imperfections (at least I'd like to think so). I'm sure my friend's toddler doesn't care!

But for this second one, I wanted to learn correctly and do it right. In about two weeks. That's a rough timeline for me! I ended up taking a month, but I have to admit that all those details (like ironing your fabrics, changing your needle...) helped make the project turn out well AND made it easier to sew along the way. It certainly created less problems towards the end of the quilt's completion. I'm so pleased with how it turned out and I hope the little one loves it!


I have a bit of the quilting bug now and I'm torn between wanting to create one for me and hubby's king-size bed (we desperately need a new cover) or making my daughter an adorable little quilt. So addicting!


stitch by stitch

Monday, January 13, 2014

"In the mountains there are only two grades: you can either do it or you can't." ~Rusty Baille

Happy New Year, compadres! I hope your January is starting off lovely, albeit cold for most of you I expect. It was quite frigid here as well last week and I'm hoping that doesn't repeat any time soon! It was rough getting back into the work routine after almost three weeks off. Besides the holidays, it was nice spending more time with the toddler and hubby, as well as getting some projects completed around the house (perhaps you'll hear more about those later).

I'm feeling excited for many things in 2014 - one of which is more time outdoors hiking and camping! I had hoped to take Rory on her first camping trip this past year, but alas we had so many other travel plans that we couldn't work it in. I only managed one afternoon of hiking and it was NOT all that enjoyable. At 11 months, Rory was still small enough to be in a carrier, not walking yet, etc. The only one I had that would work, however, was our Baby Bjorn. I love that carrier but she was just starting to get a little big (mostly because I'm so short that her legs constantly hit my knees and legs and makes walking difficult). The strain on my back was too much and going uphill was impossible with her legs hitting mine. I had to lift the carrier up and hold her in order to go uphill.

It's hard to tell here but I'm lifting her up a little since it's a slight uphill grade.

So I was determined that for this year, we would save up and buy a backpack carrier meant for hiking. I read the many reviews out there, the list of top carriers, etc. But what I really wanted to do was try one on. Considering my height and my husband's height (there's about a foot difference between us), I wanted to make sure it was easily adjustable for both of us. Last December, I finally got my chance when we were waiting for a table at the Cheesecake Factory and popped into REI for some window shopping. They happened to have two carriers in stock (Deuter Kid Comfort I and II) and I finally got my chance! This also easily narrowed our options down.

Note: There is no child in it right now. But it's so comfortable!
The Kid Comfort II felt more comfortable and had better back support than the I, so that was hands down my choice. But I didn't want to pay $240. Ouch. So we opted to check around, look online, and if the opportunity arose to get a cheaper one, we would. Or we would wait a while before buying.

Dec. 26: The After Christmas Sales come to the rescue! A few days after trying the carrier on, I was searching online for cheaper ones. I came across the site Campsaver.com which supposedly had a few in stock for about $180 plus shipping. Unfortunately, they seemed to be out-of-stock at the time, so no luck. But I signed up for their email news and coupons because why not? I already get a bunch of junk mail, so what's another to the list?

The morning after Christmas, they sent me an email with a 20% coupon off any items (both from their regular site and the outlet store) PLUS free shipping. For the heck of it, I checked their inventory and they had ONE left in the outlet store online. Woke hubby from his nap to double-check and BAM! Scored this carrier for only $140 total. I'm totally happy with that deal. And now I'm dying for warmer weather so I can take her out in it. We did a few dry runs in the house to get it adjusted and see if she liked it. All she wants to do now is ride in it and of course go outside. The toddler is ready for the outdoors and so am I!

And speaking of deals, I've had some major luck lately. Last month I scored this Dora organizer brand new, in box, at Babies R Us, for only $6 and change (instead of the listed $45).
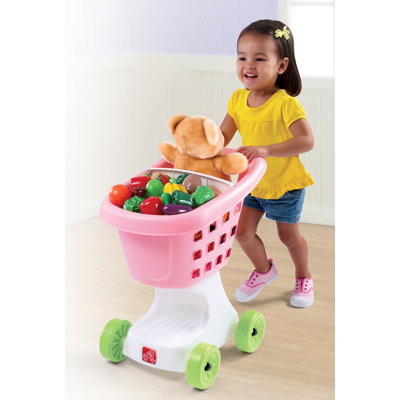
And then just today at Sam's Club, I noticed they had a few of these plastic shopping carts (again, new, in box), for only $7.51 instead of $35. Seriously. We bought it and will be holding onto it for her 2nd birthday. Now if my luck can just keep working out since it's time to look into summer vacation plans!

Monday, December 2, 2013

“We should not judge people by their peak of excellence..."


 "...but by the distance they have traveled from the point where they started.”   ~ Henry Ward Beecher

Hello again! We managed to survive Thanksgivvukah and only a little under the weather as a result. It was enjoyable though hectic and I think a little too much craziness, even for me! Weird, I know. I'm thankful that mashup won't happen again in my lifetime.

I want to share a little project with you that popped up out of the blue and has started me on the stepping stones to the larger path of my desire to learn woodworking. I finally made something out of wood! Not that I haven't messed with it a tiny bit, especially in the construction of our attic. But hubby did most of the physical construction there. Along with my other creative crafting pursuits, I've wanted to learn woodworking because the ability to build your own things is so alluring. My own tables, shelves, etc. And the intricate details! So much hard work and love goes into that.

As of yet, however, I have not the means nor the time commitment to enroll in any sort of beginner classes. Instead, I usually follow blogs like Ana White and Sawdust Girl and dream of what I could build on my own someday. But my first project is completed!

I ordered two new pegboards online for my lab at work, expecting them to arrive like the two I already have wall-mounted from years ago. Just ready for me to screw into the wall! I had some extra paint from home that I was going to use to jazz them up and add color to the drab white lab. Imagine my surprise when all I got were two pegboards. No wooden frame attached to hang them on the wall, no accompanying screws. Crap. This just turned into a bigger project.

I googled instructions on how to make a pegboard and luckily found this very simple blog post. It seemed doable to me just for the frame construction. I didn't need to turn them into flippable pieces or add handles like she did. Just the bare bones.

So I ordered the pieces online from Home Depot, after adding up measurements and figuring out how many individual pieces I would need. Pick-up was super easy, though they were a little thicker than I was imagining. (Cue just a tiny bit of alarm that I wouldn't be able to use the hand saw at work. I really didn't want to try and find the power saw in our messy basement) Once back at the lab, I marked my measurements on one piece and began the search for the hand saw. Hm. No luck finding this tool that I recall my coworker using to saw a giant tube in half. All I can find is a tiny pocketknife-type saw. It has a nice blade, but really? Is this going to work for 1x2s?

Texted coworker. Yep, that's what she used. Darn it. And I REALLY didn't want to wait until the next day or to take it home and cut it. Now I just want to build it! I had already painted the pegboard sheets a few days before and the green color was going to look great. The attachments had all arrived. I was itching to organize!

I gave it a go with the little pocketknife saw and surprisingly, it wasn't too bad. My arm was sore after cutting pieces for two frames but it was soft wood (pine) which was perfect for this little blade. And here's where I run into small issue number one. In my haste to get the frames built, I didn't double-check my measurements. And I began cutting while talking to a coworker, otherwise I probably would've noticed my error. But it wasn't until one entire piece of wood was cut that I realized I had followed the wrong measurements. And I now had two tiny pieces where I needed one longer piece. Shoot.

But no worries! I corrected the other marks and decided to cut the other pieces. I could always buy more wood, but I wanted to see the end results of the one frame first. In the end, I ended up joining the two tiny pieces with an extra screw while clamped together. Not the best, I'm sure. But they are flush and even and meet the corners squarely. So hurray! Error fixed.

Luckily, I have clamps at work, large worktables, and metal squares that will help me keep this frame nice and squared up while held in place. My drill and screws I brought from home - I am getting quite comfortable with this drill since it's helping me with lots of projects! I followed the blog post's directions on assembly and put together one corner at a time because of the table layout.

Right away, I ran into problem number two. My screws were two inch long screws. Just long enough to breech the second piece of wood and connect, but not so long as to be ridiculous screwing in. However, with the softness of the wood, my first corner began to crack and split as the screw went in. It didn't help that a giant knot of wood was located at the corner and part of it fell out, making it a little thinner at the edge. Lucky me, it seemed to hold strongly and didn't split completely. But after this one, I was nervous and screwed each one in as slowly as I possibly could and tried not to counter-sink the screws too much.

You can see the frames along the side of the pegboard.
Minor mess-ups avoided, I had a student help me assemble the pegboards to the frames with small finishing nails and later that week, we mounted them on the wall. They really add a nice pop of color to the space! So much so that I had to go back and paint the other two I already had on the wall.

My first real woodworking project without any help from my hubby. Now I just hope it doesn't fall off the wall anytime soon...I DID use a stud finder at least. :)

DIY Show Off
http://diyshowoff.com/category/other/that-diy-party/" title="DIY Show Off">http://i899.photobucket.com/albums/ac195/Roeshel/f15dcd81-7780-4021-949f-51682cd76964_zps2db7cec4.jpg
I'm joining That DIY Party today!

Monday, November 25, 2013

"Character is the ability to carry out a good resolution..."

"...long after the mood in which it was made has left you."  ~ Cavett Robert

Alright folks, it's time to get my shit together. It's been a fantastic year in many ways, but I've also been feeling...low? disappointed? Not quite depressed but just meh regarding some of the things I used to have time for. And though I enjoy my job, it's not an easy place for upward mobility and new challenges. So I'm in a funk, to be frank.

Having turned 30 this past September (which wasn't a terrible birthday) and following it with an awful month of losing two pets abruptly, I'm ready for some good cheer and new goals.  I am NOT going to call them resolutions because I don't like the New Year's resolution ideas- they are so temporary. These are permanent goals I will always have.

1. Get back to the gym and get in shape again. I haven't belonged to one since the birth of my daughter (and THAT'S been 18 months...) and I really need both the physical workout and the highs from it. I can do yoga at home sometimes but I need a place away from home to stay committed.

2. Get back into blogging again. I never set deadlines or goals for myself, just some projects here and there. But I miss writing and showing some of my crafts. I don't have quite as much time for it and the focus has often shifted to child crafts, but I still enjoy this avenue of sharing.

3. I didn't really have a set goal to do for my 30th birthday or even a written bucket list. I would like to start accumulating little ideas for a bucket list. When I think of them, I'll jot them down (or hopefully write them all here!).

I think that's it for now. I just want to get a little of ME back, you know? Stay tuned for a post on my bucket list and two I've recently accomplished without realizing it!

Sunday, March 17, 2013

"Never iron a four-leaf clover because you don't want to press your luck." ~Anon.

"Mummy, I want to go outside today!" She's itching for warm weather!
Last month, Rory and I had a Mommy and Me day. We visited an indoor play gym (her first introduction to a ball pit, which she loved so much we had to create one at home), had lunch, did a few errands, and then made a BIG mess with finger paint.
Rory enjoying the finger/body paint
I had chosen a word that I wanted to show up after the paint was on, using masking tape to write them out. We picked our (washable) finger paint color, squirted it on, and let her go to town! After letting it dry, I carefully peeled the letters off. And took Rory into the shower to get cleaned up.


We decided to embellish it a little, instead of leaving it blank. And what better theme than St. Patrick's Day? I gathered an odd assortment of supplies from my craft closet to pick and choose what we would decorate with.


And with a little marker here, some fabric and glue there, voila! We have ourselves the perfect St. Patrick's Day decoration or year-round decor (since it could totally fit in with our stuff). I need to attach a proper hanging bar on the back, so for now it's crooked. But I kind of like it that way. Happy St. Patrick's Day!


It's hard to tell, but the two gold shamrocks are actually all glitter. Click the pic to see the details better.


Saturday, February 23, 2013

Roses are red, Violets are purple, Isn't it a shame, Nothing rhymes with purple?

I haven't been able to craft and sew as much as I'd like lately (with work, baby, and classes). But when Rory's daycare sent home a note about a Valentine's Day exchange if parents wanted to participate, my first thought was A New Project!

I like practical things, even if they are sentimental. I also love holidays and traditions, just for the sake of celebrating the holiday. We have to make life interesting, right? Valentine's Day is one that I know I will enjoy more and more each year with my kid and hubby to celebrate it with. And who am I kidding, I love hearts. So I didn't want to just buy a pack of Valentine's cards, write the babies' names on them, and that be it. I know they'll get tossed or just take up space somewhere. Then I thought about making personalized Valentine's cards. Hm, a step in the right direction but not quite it. What would babies love? And what can I make that I'm good at?

Aha! A personalized Valentine's book. And even better, it can have a hard cover, but have the inside be like a soft cloth book. There will be a little poem, different textures to touch, and commemorate baby's first Valentine's Day (or second for some). Of course, this took up a good bit of my time. But when I have an idea in my head, it's just not going away until I do it!

Ta-da! Here is one of the book's I made for Rory's classmates. Her book has a different poem in it but it's the same construction. It helped that there are only 4 other babies in her classroom. There were many details I wanted to add (I wanted to have felt letters throughout instead of using non-toxic markers); but I was running out of time and had to reassess as I kept going. I wanted them done for the party and I wanted a book for each kid. So some details had to be sacrificed. There is a layer of batting inside each cloth page, just for added thickness. I then sewed each page to ribbons that are attached to the covers. That way it's all secure! I hope the kids enjoyed them (I know the daycare workers did) and if they stay in Rory's group, they can expect more crafts to head their way...for good or bad! Check out the pictures below and hopefully soon I'll be posting my and Rory's St. Patrick's Day craft. We recently had a mommy and me day (daycare closed for professional development day) and we took advantage for some fun. Hopefully I won't post it as late as summer!


Baby Gonzo Halloween Costume, all finished!

It is much delayed (though not forgotten during that whole time...just not a priority) but here is the finished costume! Rory's first Halloween, dressed as baby Gonzo, and she slept through the whole parade.

I dressed up as Nanny, though pretty much no one knew who I was. Hubby (below) put together his costume that week as animal. This photo is right before the parade, but she fell asleep right before it started. We walked through the whole thing with her passed out! Poor gal.

In the photo below, you can get a better view of Gonzo's face (some people in the parade knew her costume right away, but some little kids called her Elmo. *sigh*) I know I took photos of just the costume, but I'm not sure where those are at the moment. And you've waited long enough!

Constructing the head took by far the longest amount of time. There was a lot of hand-sewing, hot-gluing, stuffing (for the cheeks), and generally just patience that was required. The eyes were tricky but not as much as the nose. For the mouth and the bottom half of Gonzo's face, I added snaps. That way, it would be easy to put on her and just open up the mouth if needed. I also made the entire hood snapped to the body. That way if she got hot, I didn't have to take the whole costume off, just the hood! In the picture below at her daycare party, you can see how the mouth is unsnapped.

We included Camilla, a toy wind-up chick we have for the cats to play with. Sadly, we didn't win any prizes this year. But she looked so cute! And I've kept the costume because I think I can even turn it into a puppet of sorts. So, a very belated Happy Halloween! We've already though of ideas for next year's costume, though some of them she may  be too small for. And eventually, she'll want to choose her own costume. But I'm not ready to think of that yet!

Wednesday, September 19, 2012

Baby Gonzo Halloween Costume: Overalls


 I finally finished the first part of the Baby Gonzo costume after some weeks of working on it here and there. Originally the plan was to find a free overalls pattern but there weren't any online that matched up with what I was looking for. And I didn't want to try it on my own just yet. So I found a pdf download on Etsy. It did the job, although parts of it could have been written or drawn a little clearer. I figured it out but it would have saved me a little bit of time. The pattern does have many sizes, so as Rory grows, I can make her lots of overalls!

The pieces were, mostly, straightforward but there were a couple of tricky areas. One was sewing the snaps in the bottom so that I can change her diaper easier! The other was sewing the buttonholes. I've always done them by hand (poorly) but I used my sewing machine this time. Oh my goodness! How wonderful! I will never sew buttonholes by hand again! The snaps were another story...I've tried them in the past with the little hammer tool with no success. I decided to give it another shot and I failed again. Perhaps the fabric layers were too thick for the teeth on the snaps? No matter. I had to find sew-on snaps and I had a lovely 'duh' moment in Joann's. I was confused why the package had only the plug part and not the sockets. I spent WAY too much time staring at all the snaps packages, trying to fit them in other snaps, until I finally asked the woman working with the sewing machines. And she showed me that the pieces are already snapped together in the package. I would've figured it out eventually when I got them home! But they were much easier to put in.


Finally, Camila the chicken! Well, baby chick. Gonzo has a little chicken applique on the front of his overalls. I sketched it up and made my own pieces out of felt and fleece. The butt feathers are a little skinny but oh well. So what do you all think? Close to the original? It will probably still be a little long and wide on her but once she has the rest of the costume on, that will fill some of the bulk. I've started on the next part (blue furry body) so stay tuned!


Saturday, August 11, 2012

Baby Gonzo Halloween Costume: Materials


Many times during a project, I often forget to take pictures until I'm halfway through or I've already completed certain steps. It's not like I'm writing tutorials so that's usually fine. And I'm just blogging for my own amusement. But since I'm really focused on sharing the Baby Gonzo costume's progress, I thought I'd share what materials I'm planning to use before I even get started.

I originally purchased a pattern for the overalls but decided to return it, confident I could find something online for free. Well, that hasn't really been the case but I've found numerous tutorials where sewers have managed to construct their own. So I'll just attempt my own pattern and see how it goes! I'm hoping that the overalls can be wearable separate from the costume (because they're so cute!), so they'll need to fit well. The red corduroy fabric will be the main overall fabric and I still need to raid my stash for a lining fabric. The scraps of yellow fleece will make the chicken applique and I found cute yellow buttons to fasten the overall straps. Little snaps will complete the legs so it's still easy to change her. :)

Now for the tricky part: Gonzo's face and fur! It took me a bit to find a fabric that could work as furry muppet skin. At first, I was envisioning something a bit more...furry? Like the thick fake fur stuff. But they didn't have blue of course and I only briefly considered buying white and dying it. Then I stumbled on this blue fleecey fabric (technical terms of course!) and it felt perfect! It has just enough of a pill/nap to it that it can be interpreted as fur and it's the perfect color (cheap too!). I decided to just buy a hoodie in her size (well, the size she'll be around Halloween) and sew the blue fur to the outside of it instead of trying to make a hoodie out of it and line it, add a zipper, etc. I need to think efficient! Thus, the grey hoodie.

Now, for Gonzo's head, I'm going to use the hood as a base and then construct a 3D effect of his nose and mouth with cardboard tubes and paperboard. It need to be light enough that it's not wearing heavily on Rory's head so those materials should be perfect while retaining shape and stiffness. I'll cover the nose, face, and mouth interior with the felt pieces I have displayed (light blue, black, red, pink). As for his eyes, I found the perfect size styrofoam balls. I'll paint the dark iris part and then for his eyelids, I have the felt bits I can use. I want it to really seem like a muppet, not just looking like one. I may even cover the ball with white felt first, use black felt for the eye, and felt for the eyelid. Then it will seem even more like a muppet. Also (and it might be hard to see up there next to the light blue felt and hoodie), I needed to find something to make the little feathers that stick up from Gonzo's head. Luckily, there was a little feathery accent piece on clearance at Joann's that I can snip some from and hot glue on. Hooray!

Last but not least, Gonzo's shoes. Rory may or may not be wearing shoes yet (she has narrow, long feet which are hard to find baby shoes for), but she'll need them to match the costume appropriately. The white and yellow felts in the upper left corner will be used to construct a shoe coverup to match Gonzo's costume.

And so far that's the plan! I need to double-check old episodes of Muppet Babies to see if there are any details on the back of Gonzo's overalls. And now I'm eager to get started with the actual sewing!

Sunday, July 29, 2012

Halloween can never come soon enough...

Hubby and I (OK, mostly I) are extremely excited for Rory's first Halloween. I've been vetting costume ideas for a couple weeks in my head since I know I need to get started soon. I'll invariably choose something that requires a great deal of work and would rather not realize I'm screwed around October 15th. Our town also has a Halloween parade with prizes and I wanted to choose something that we could perhaps turn into a family themed costume.

After considering the usual cute baby costumes (a pumpkin, a teddy bear, a duck, and so on), I tried to think of something unique that would represent our tastes. And what better than the Muppets? (Seriously, if you don't know me, I'm crazy about the Muppets) I debated on which Muppet to make Rory (Fozzie is cute and fluffy, Gonzo is quirky, Animal is off-the-wall but recognizable, Kermit is too common, and Miss Piggy is just out of the picture). I would also have to choose one and really, I don't have a favorite. I like them all! And hubby could care less, as long as I dress him up.


And then I remembered Muppet Babies - what a perfect costume for Rory! I could be Nanny because it's super easy and I won't have time to go crazy on mine. The dilemma was which baby should Rory be? Fozzie, again, is adorable and fairly well-known so I don't think most people would assume she's a teddy bear (at least, I hope not). But baby Gonzo is just ADORABLE with his tiny red overalls and baby chicken (Camilla) that he carries around. In the end, the red overalls won me over and the excitement over replicating blue fur and Gonzo's nose. Baby Gonzo it is! And the overalls will still be able to be worn after Halloween. Win-win!


Hubby's costume was a little trickier to decide because he's not exactly a baby....for now, Scooter fits his personality best and we'll see if I have time to worry about his. We can certainly make it simpler than Rory's costume (find a shirt with the right colored stripes and hubby can wear his glasses, make his hair stick up a little or find a beanie).

I'll post pictures as I work on the baby Gonzo costume so you all can see how it's going!

Tuesday, July 10, 2012

"Sometimes the smallest things take up the most room in your heart." ~ A.A. Milne

So if you haven't been able to tell, my blog has been on a bit of a hiatus due to the arrival of my daughter! Rory Louise made her debut on Memorial Day and we've been busy spending all of our time with her. She was a small gal, 6 lbs 8 oz (thank goodness!) and either 19.5 inches or 18.75 inches long. There is some debate over this between the hospital measurement and the pediatrician's measurement. We are completely enamored of her and I will do my best to keep this blog from revolving around her. Hard, I know! But we have a separate blog to gush over her for family and friends, so you all should be safe. :)

There are so many things I could say to just tell you a little about her, but I'm too overwhelmed to just choose one. I'm trying to adapt to my time at home with her, soaking it up as best I can while still trying to find time for myself (today was my first visit back at the gym, courtesy of the nursery they provide their members!). I hope to begin many more crafting projects and continue to do my home improvements, or just posting about whatever strikes my fancy. So hang in there, I'll be back little by little!

Thursday, May 3, 2012

"Finished is way better than perfect!" ~Anonymous Quilter

Just a little over 4 weeks to go, dear readers! Until the due date that is. ;) Who knows when she'll actually arrive. She's been fairly stubborn so far for many of her exams and ultrasounds so I wouldn't be surprised if she either decides to arrive early or clings to the inside of my uterus for extra days on end. I thoroughly expect a very stubborn child!

Last month, right before my very own baby shower, I finally finished the quilted gift that I started LAST year for a friend's baby shower. At least her son didn't need it yet, right? ;) I thought I would share the finished product with you all since I *did* share teasers when I first started it. It was my first attempt at a quilt and while it didn't turn out perfectly, I am hooked! I can't wait to make more--though I might start with little small swatches now to get some of the techniques perfected. A crib-size quilt was a perfect size to start with. My friend's nursery is Super Mario Brothers themed, so I wanted to go along with that. A green mushroom seemed perfect!

Looking at it from far away, I like how the mushroom looks ultimately. While I worked on it up close, I wished I had gone with fewer colors.

A wee bit more of a close-up so you can see the tiny squares. 30x30, all hand-sewn. It was a bit of a pain and part of the reason it took so long.
I don't have any pictures of the back, but the green front and brown back were both a soft plain flannel. Much of the quilt is hand-sewn, particularly because I had trouble with my sewing machines until I finally bought a new one in January/February. The quilted designs on top were done with the sewing machine, but the rest of it, including the finished edging, was done by hand. It was just easier that way. I don't think it would have turned out as nicely if I had attempted all of it on the sewing machine.

It was a lot of fun and I can't wait to start something new. Perhaps a small wall hanging for the nursery (which is pretty much done so I should stop adding things). Pictures of that to come soon!

Tuesday, February 28, 2012

"There are two ways of being creative..."

"...One can sing and dance. Or one can create an environment in which singers and dancers flourish." ~ Warren G. Bennis

(I'm just looking to make a little girl flourish, not necessarily be a singer or dancer. I DO hope she gets my creative genes though. ;) )

Hello blog. I miss you. I miss having more time for crafty projects but it's been full speed ahead with getting the nursery set up and decorated. Plus we had a nice babymoon to Mexico and then hubby was in the hospital with pneumonia (not from the trip). With the third trimester starting, my energy levels are tanking again so I doubt I'll suddenly get a second wind for writing.

But to keep you all eagerly waiting for more, here is a glimpse of the fabric I'm using for the roman shades in the nursery. I'm about half way done with them and once I get them hung, perhaps I'll share a photo of the room. I'm also using the new sewing machine I got over the holidays, which is AMAZING. It's a simple Janome but when you have two at home already with issues, it's so nice to just be able to sew something without running into problems. And not hand sewing it either!

Wednesday, January 4, 2012

Baby Pickles is a Girl!

Happy New Year, folks! 2012 is coming in with a bang for me and hubby. We celebrated the new year with our annual party with friends. Though small and tame this year, it was just perfect for my level of exhaustion. It's full-speed ahead in baby land! We've begun work on clearing out and decorating the nursery, our new crib is set to arrive this week, and I'm suddenly a bit larger. To top our new year off, we were able to find out that Baby Pickles is a girl! (The delightful news is still sinking in....we'll have a daughter...that seems so strange!).

Courtesy of Once Wed
I've been thinking all sorts of thoughts for simple decorations in the nursery and my first project is going to be these lovely fabric pomanders. Just a few hanging from the ceiling by some ribbon will be darling. The instructions are quite simple and I'm eager to go find some fabric and lanterns. I'll let you know how they turn out!

Thursday, December 15, 2011

"Babies are such a nice way to start people." ~Don Herrold

I would like to share some lovely news with you, dear followers. You may have noticed my hiatus from blogging (not that I was very regular at it). Considering how hectic my fall months had been, I needed a break from pretty much everything. There were nights I was too tired to do anything except sit on the couch and stare at the TV. Me, the Queen of over-committing but still getting it all done, did nothing. It still sounds like a joke to me!

The reason for all of this? Hubby and I are expecting our first child next June! It's been a tiring and nauseating few months, but now that I've hit the 4 month mark, I seem to be feeling a little more like my old self. I don't know that I will be doing as much crafting as I'd like (even for an adorable nursery), but I'll certainly share as much as I can over the next few months!

We do hope to find out the sex of Baby Pickles in January (we nicknamed it pickles because it looked like one on the ultrasound pic and I kept eating pickles like they were salvation in a jar) and our nursery decision will be based on that.

So happy holidays to my wonderful readers! I hope 2011 has been a great year for you and that 2012 will be even better!

Monday, October 31, 2011

"'Tis now the very witching time of night, When churchyards yawn and hell itself breathes out Contagion to this world." ~William Shakespeare

Oh, dear. How I have neglected you, dear reader(s). It's been over a month and again, I have no excuse but that I've had a lot on my plate. Since Sept. 26th (my last post), I've celebrated my 28th birthday, moved into my new office and responsibilities, took my first trip to Tennessee to visit a friend, lost a fish, lost a guinea pig (very upsetting), had another fish get sick and get better (though he may be blind in one eye now), got a new niece, visited festivals, planned (and survived) a museum fair, had crazy storms destroy many of our Halloween decorations, taught 3 workshops, saw a coworker retire, celebrated my 5 year wedding anniversary, had weekend guests, received snow before Halloween, got lazy with my Halloween costume, and still have yet to carve my pumpkins. Whew. Happy Halloween!

November should be a trifle better. At least I hope so. I'm only doing 4 workshops, after all. :)

As mentioned, (unless you skimmed over it), many of our Halloween decorations were destroyed by storms this year. I have some lovely metal fencing, an arch, and a twisted lamp post that got blown over numerous times. The arch's lights aren't working and I'm hoping nothing snapped. The lamp post isn't working at the moment but I'll try putting another light bulb in before trick-or-treating tonight. I had two creepy gargoyles that sat on the railing at the top of the steps on either side. They also blew over (which NEVER happens). One lost an ear and the other one shattered almost the entire head. I was going to try gluing it back together but just didn't get to it yet. Many of my light strings didn't work this year, including a spider web that I just bought last year and hung on our new fence. I was very disappointed with that.

Needless to say, I'm not feeling very Halloween-ish this year. We have yet to carve pumpkins and since our snowstorm this past weekend, it feels as though it's nearly Thanksgiving! I did manage to create an adorable little crafty project for my Tennessee friend's kids. I wanted to make something that they could hang up year after year that was also personalized. An idea for a felt jack-o-lantern with each child's name "carved" into it popped right into my head!

I sketched it up on tracing paper a few times to get the sizing and letters right before I cut my pattern.

Then, I started putting layers together. A full orange felt layer was the back and I decided to use scraps of yellow fleece (from my Peep creations which I realize I never shared with you all) as the lit insides of the pumpkin. I cut the individual layers out of the top layer of orange so that it would look carved. I used fabric glue all around the edges to keep it all together.

I added light yellow bits of felt to give dimension to the carved letters, again just using fabric glue. Then I sewed the decorative lines of the curved pumpkin shape. Finally, I connected all the pieces with a blanket stitch around the edges, leaving a space for the stem. I decided to do a looped piece of felt so that it could be hung on a doorknob, hook, or wherever you may want to attach it.

I chose a different shape for the second pumpkin just to make each more unique. I think they both enjoyed their gifts and I greatly enjoyed my visit!


Happy Halloween!